The Checkr Tenant API powers tenant screening workflows. This guide walks through the steps required to place your first order.
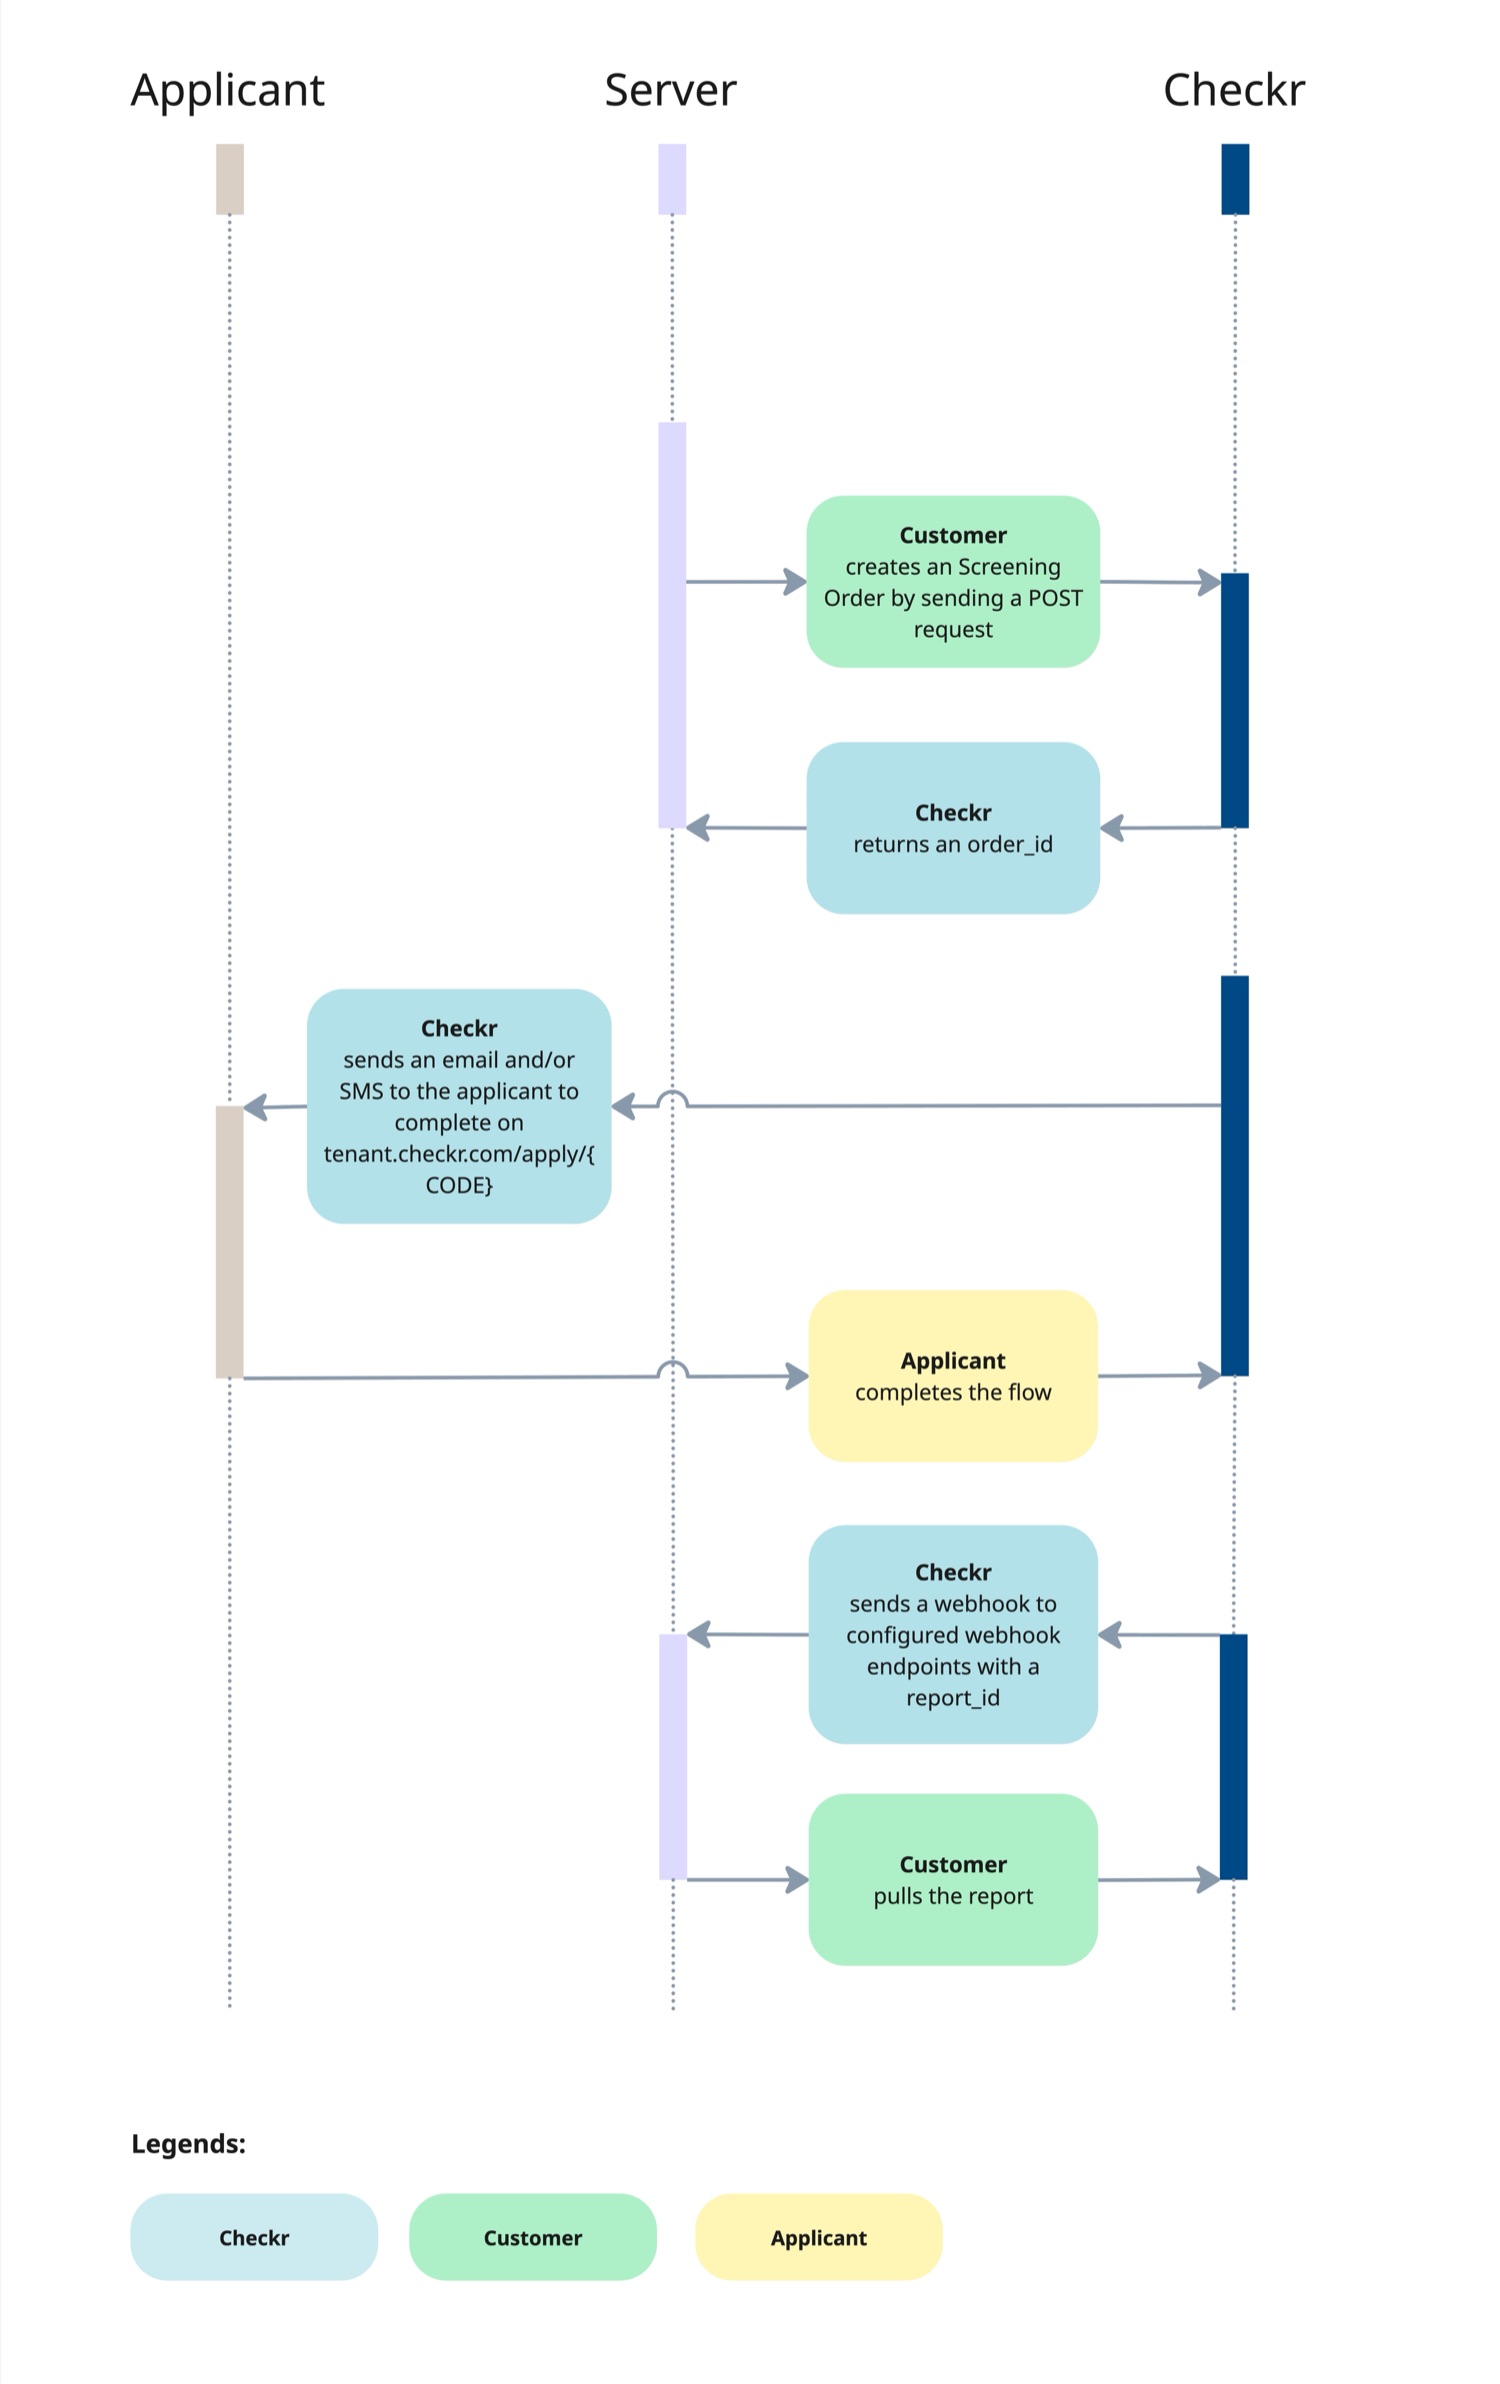
End-to-end, a screening flows through three parties — you, the Checkr Tenant API, and your applicant:
- You create an order. Send a
POST /ordersrequest with the screeningpackage,propertyaddress, andapplicantidentity fields. - We return an
order_id. You'll get back a201 Createdwith the new order, including its id, current status, and oftenapplication_url— the applicant apply link. That field isnullwhen the apply flow is skipped (most test-mode profiles auto-submit; see Applicant Experience in Test Mode) or once the order is no longerwaiting_for_applicant(pending,completed, orcanceled). - We contact your applicant. When the apply flow runs, we email them a link to
tenant.checkr.com/apply/<code>(the same URL asapplication_url). In live mode, if the applicant has a phone number, we also send an SMS with the link. They provide consent, their current residence, and any remaining identity details (DOB, SSN). You can also shareapplication_urlyourself. - Your applicant completes the flow. Once they submit their information, we start running the screening asynchronously.
- We send you a webhook. When the report is ready, we
POSTareport.completedevent (along withreport.created/report.updatedalong the way) to your registered webhook endpoints, including thereport_id. - You pull the report. Fetch it via
GET /reports/{id}using thereport_idfrom the webhook payload.
The rest of this guide walks through the one-time setup required before you can place your first order.
API access is granted on a per-organization basis. To request access, email hello-tenant@checkr.com from your work address and include your organization name. A member of the Checkr Tenant team will reach out to confirm and enable API access on your account.
A saved payment method is required before any orders can be placed. Add one from the Billing settings page in your dashboard.
If you attempt to create an order without a saved payment method, the API responds with 422 Unprocessable Entity:
{
  "errors": [
    {
      "code": "validation_error",
      "detail": "A saved payment method is required to place an order."
    }
  ]
}Generate keys from the Developer settings page in your dashboard. Two key types are supported:
| Prefix | Environment | Use for |
|---|---|---|
ckr_sk_test_… | Test | Development and integration testing |
ckr_sk_live_… | Live | Real screening orders billed to your account |
Test keys route to canned provider responses and produce inert, unbilled records. See Testing for the available scenarios and how mode isolation works.
Send the key on every request as a bearer token:
Authorization: Bearer <your-api-key>The minimum required fields are a screening package, a property address, and an applicant with first_name, last_name, and email. The applicant is prompted to complete identity fields (DOB, SSN) via the consent form if you don't supply them. Legacy clients may still send full_name instead of first_name and last_name, but the two name forms are mutually exclusive.
curl https://api.example.com/api/orders \
  -X POST \
  -H "Authorization: Bearer <your-api-key>" \
  -H "Content-Type: application/json" \
  -d '{
    "order": {
      "package": "starter",
      "property": {
        "street": "123 Main St",
        "city": "San Francisco",
        "state": "CA",
        "zipcode": "94105"
      },
      "applicant": {
        "first_name": "Jane",
        "last_name": "Doe",
        "email": "jane@example.com"
      }
    }
  }'
A successful request returns 201 Created with the new order. See the full schema in the API Reference.
Reports are processed asynchronously after an order is placed. Rather than polling, you can register webhook endpoints to receive events as they happen:
report.createdreport.updatedreport.completed
Webhook payloads are signed so you can verify they originated from Checkr. See the Webhooks guide for endpoint registration, the full event list, and signature verification.
If you'd rather not run a webhook receiver, you can poll GET /orders/{id}/report instead. While the report is still pending the endpoint returns 404 Not Found — treat this as "not ready yet" and retry, not as a broken link. Once it returns 200 OK, the report is available. Terminal status lives on each product included in the order (criminal_history, credit_report, eviction_history, identity_verification, income_verification, sex_offender_registry, global_watchlist); inspect the status field on each non-null product for values clear or consider to determine when the screening is fully resolved.
- Testing guide — test API keys, canned provider scenarios, and mode isolation
- Webhooks guide — register endpoints and verify signatures
- API Reference — full resource and schema documentation